Making a mirror glaze cake is an art form. It requires patience and precision, but the results are truly dazzling! With its show-stopping shine, this impressive dessert can transform any meal into something special. All it takes is some simple steps to get your delicious masterpiece ready for display. Read on to discover how you can create your own beautiful mirror glaze cakes in no time – with mouthwatering results that will make all of your guests swoon!
1. What Is A Mirror Glaze Cake?
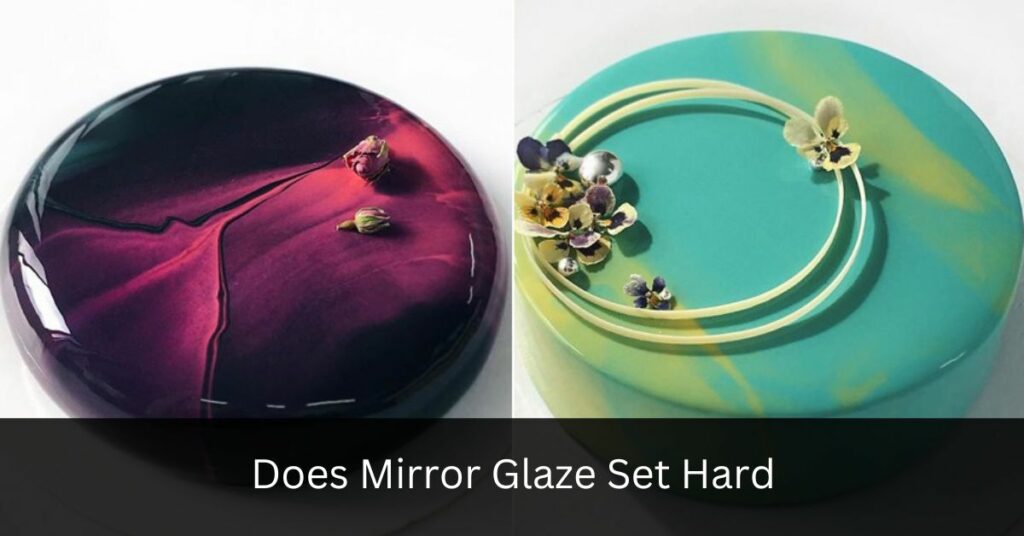
Mirror glaze cakes are the latest culinary trend that is taking the food world by storm. Imagine a dessert so beautiful, it looks like something out of a fairytale; this is what you get with mirror glaze cakes! With their shiny and reflective surface, these cakes look as though they were made in an enchanted kitchen.
To create these mesmerizing desserts, there are several steps to take. First of all, one must prepare a thin fondant icing which will serve as the base for the cake’s design. This requires melting chocolate and adding gelatin until you have reached your desired consistency. Afterward, different flavors can be added such as raspberry or lemon for extra zestiness!
Now comes the tricky part – getting everything just right so that when poured over the cake it creates that glossy finish we know and love about mirror glaze cakes. To do this correctly, it’s important to measure out all ingredients precisely and add them slowly while continuously stirring. This prevents any lumps from forming which could ruin the entire effect. Once perfected, simply pour onto your finished cake and wait patiently till it hardens – voila! You now have your very own masterpiece worthy of royalty!
2. Preparing The Cake
To make a mirror glaze cake, the first step is to prepare the actual cake. It’s important that you have your ingredients and supplies ready before beginning. You’ll need butter, sugar, eggs, vanilla extract, all-purpose flour, baking powder, and milk.
Once you have everything gathered in one place, preheat your oven to 350°F (175°C). Cream together the butter and sugar until light and fluffy. Then add in the eggs one at a time while continuing to mix on low speed until combined. Next stir in the vanilla extract followed by the dry ingredients: flour and baking powder. Finally add in ¼ cup of milk then beat with an electric mixer or wooden spoon for 2 minutes until fully incorporated into mixture.
Divide batter evenly between two greased 9 inch round pans lined with parchment paper and bake for 25 minutes or until toothpick inserted comes out clean. Allow cakes to cool completely before adding any frosting or decorations. Once cooled down it’s time to move onto creating the glaze!
3. Creating The Glaze
Creating the glaze is the part that truly makes a mirror cake shine. The first step towards making it shimmery and perfect involves melting together some chocolate, butter, sugar, and cream. As you stir these ingredients together in a pot on low heat, a delicious aroma begins to fill your kitchen – something sweet and tantalizing that’s sure to make everyone’s mouth water!
Once everything has melted and blended evenly, remove it from the heat and let it cool slightly before adding whatever flavorings or colorings you’d like. From there, all that’s left to do is pour the mixture into a bowl and place it in the refrigerator for about an hour so that it can thicken up. Afterward, you’ll have yourself a beautiful glossy mirror glaze ready to be used on your cake!
Now comes the fun part: decorating with this gorgeous liquid gold. You can use it however you’d like; drizzle some of it over individual slices or pour it all over top for an even finish. With just one look at its reflective surface, anyone will see what made this dessert special. It certainly takes time to get right but once complete, you’ve created an eye-catching masterpiece worthy of showing off!
4. Assembling The Cake
Mirror glaze cakes have become increasingly popular in recent years. In fact, searches for ‘mirror glaze cake’ on Google have risen by a staggering 500% since 2017! Now that you’ve created the beautiful mirror glaze, it’s time to assemble the cake.
Start by preparing your cake layers. Make sure they are completely cooled before continuing with assembly. Place one layer of sponge down onto a serving platter or cake board and spread your desired filling over it. If using fresh fruits, make sure to drain off any excess liquid beforehand so as not to ruin the texture of your frosting later on. The next step is to place another layer of sponge onto the first one and repeat this process until you’ve got five layers (or however many you choose).
Once all the sponges are stacked up and filled, take some buttercream and coat the sides of the entire stack evenly – making sure there’s enough coverage to hide any gaps between each layer. And if desired, pipe rosettes around the edges of your cake for an extra decorative touch before pouring over the mirror glaze. This will give it a professional-looking finish once completed. With these last few steps done, you’re almost ready to pour over that beautiful glossy glaze…
5. Pouring The Glaze
As the saying goes, “the proof is in the pudding”. When it comes to making a mirror glaze cake, this proverb couldn’t be truer. The last step for creating a beautiful and delicious masterpiece is pouring on the glaze.
The key to achieving an even layer of glossy glaze over your cake lies in its preparation. To ensure that your glaze will evenly coat your cake, you want to make sure that it’s at room temperature before pouring it onto your creation. This can be done by warming up cold glaze or cooling down hot glaze until it reaches around 70°F (21°C). Additionally, if necessary, strain any lumps out of the mixture with a sieve so you don’t have any bumps on the surface when finished.
Finally, pour the smooth liquid slowly over one side of the cake until all sides are coated. If there are gaps between layers or sections of decoration on top of the cake, fill them in first with some extra drops of glaze as needed. Once complete, tilt and turn your pan gently from side-to-side to spread out and flatten any excess glazing into a thin sheet across the entire surface without leaving behind streaks or drips. Now your masterpiece is ready for decorating!
6. Decorating The Cake
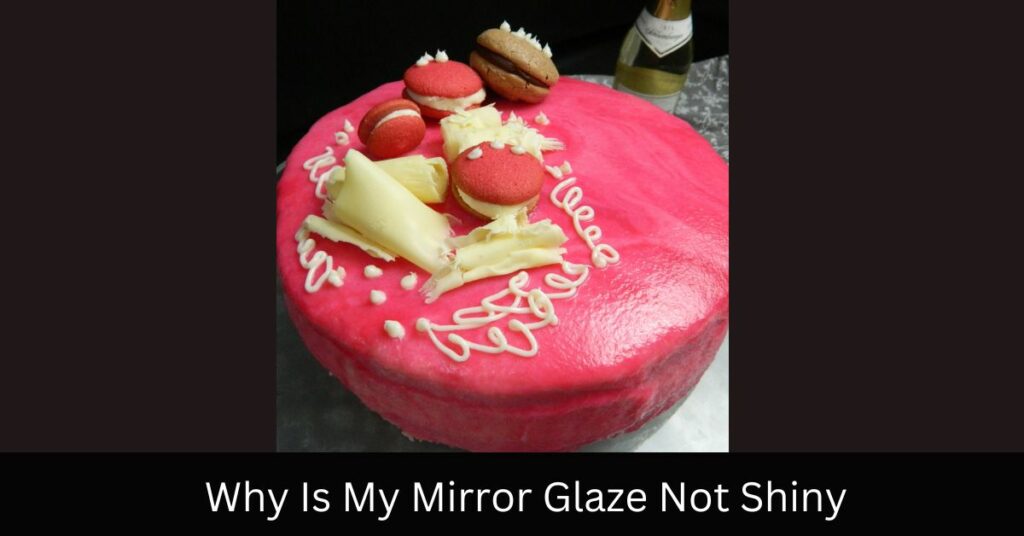
Decorating a mirror glaze cake is the most fun and creative part of making this show-stopping dessert. Take, for example, my friend’s daughter who recently celebrated her 5th birthday with an incredible Pink Unicorn Mirror Glaze Cake! After pouring on the glossy glaze, it was time to bring out all the decorations.
We chose edible flowers in pastel colors that matched her party theme perfectly, as well as shimmery sprinkles and small pink pearls. We carefully arranged these around the top edge of the cake and sprinkled some over the surface too. The end result was breathtaking – I couldn’t believe how beautiful it looked!
She also asked us to write ‘Happy Birthday’ on top in silver lettering. This added a nice personal touch to complete the decoration process and make it truly special for her daughter’s big day. With its unique look, everyone at the party wanted a slice! Moving on from decorating…
7. Serving The Cake
Now that the mirror glaze cake is finished, it’s time to serve it. Serving a freshly made cake can be an exciting and rewarding experience. First of all, make sure there are enough plates and cutlery for everyone. If you’re using a large platter or serving dish, ensure that the cake is displayed in a way that will grab people’s attention. When cutting the cake, keep in mind how many slices you want each person to have so you don’t end up with too little or too much cake left over.
When serving the cake, use a knife to spread some extra glaze on top if desired – this gives it even more of a wow factor. Finally, when presenting the masterpiece to your guests make sure to explain what kind of cake it is and how long it took to create! This will help them appreciate just how special this delicious treat really is.
In addition to providing instructions on how best to enjoy the mirror glaze cake, why not offer up some interesting facts about its ingredients? Your guests will love learning more about their dessert while they savor every bite of this unique creation!
Frequently Asked Questions
What Ingredients Do I Need To Make A Mirror Glaze Cake?
Mirror glaze cakes are a popular dessert choice that adds an extra bit of sophistication and elegance to any special occasion. To make this delicious cake, there are certain ingredients you will need. First, it is important to have the basics – flour, sugar, baking powder, eggs, butter or oil. You’ll also need some liquid such as milk or water for texture. Then comes the fun part: choosing the flavors! Depending on your preferences, you can choose from cocoa powder for chocolate flavor, vanilla extract for traditional taste, lemon juice for zesty citrus notes; even ground coffee beans if you’re feeling adventurous!
Next up is the star of the show – the mirror glaze itself. This usually consists of gelatin (which gives it structure), condensed milk (for sweetness and creaminess) and food coloring (if desired). For added indulgence and shine you could add some white chocolate too. Once all these elements are combined in a saucepan with constant stirring until everything has melted together into a glossy syrup-like consistency, then you’re good to go!
The last step is assembling your masterpiece. Start by pouring your batter into two prepared round cake pans and bake according to instructions given on the box. Let them cool completely before adding frosting or ganache between layers as well as over top of the entire cake. Finally pour your mirror glaze overtop evenly and let harden before serving– voila – now enjoy your beautiful reflective creation!
Is A Mirror Glaze Cake Suitable For A Vegan Diet?
Shimmering and inviting, the mirror glaze cake is a showstopper with its glossy shine. But if you’re vegan, is this tantalizingly sweet dessert still an option? The answer is – yes! A mirror glaze cake can be made to fit into any dietary requirement.
Vegan baking has come a long way over the years, allowing for more creative freedom in the kitchen. With egg replacements such as flaxseed or apple sauce and dairy-free alternatives like coconut milk or almond milk now widely available, it’s simple to make a vegan version of many desserts. In fact, some ingredients used in traditional recipes are already plant-based by nature; sugar being one of them!
So why not give your next special occasion that extra sparkle with a vegan-friendly mirror glaze cake? You’ll find plenty of delicious recipes online that use both classic and innovative ingredient combinations so you can create something unique every time. Plus, with little effort required other than whipping up the batter and pouring on the glaze, it’s sure to become everyone’s favourite go-to treat.
Is It Possible To Freeze A Mirror Glaze Cake?
Mirror glaze cakes can be a stunning addition to any special occasion, but there is one question that many have: is it possible to freeze a mirror glaze cake? This can be tricky because of the delicate nature of the frosting. Let’s take a look at what you need to know before freezing your mirror glaze cake.
Here are 3 things to keep in mind when freezing a mirror glaze cake:
• The cake should ideally be frozen without its decorative topping.
• Make sure that the cake has cooled completely and wrap it well with plastic wrap or aluminum foil so that no air gets inside.
• Place the wrapped cake into an airtight container for further protection from freezer burn.
When defrosting, make sure the icing doesn’t come into contact with water droplets as this could ruin the effect. If you want to preserve your beautiful creation, remove it from the freezer a few hours before serving and allow it to thaw slowly in a cool place – not on top of a counter or directly under sunlight! Once thawed, you can add additional decorations if desired and enjoy your delicious mirror glaze cake.
How Long Does A Mirror Glaze Cake Stay Fresh?
Mirror glaze cakes are all the rage nowadays, and they look so darn tasty that it’s no surprise! Though a lot of people might not know this, you can actually freeze these types of cakes. But what about how long they stay fresh? Well let me tell ya:
The answer to this question depends on various factors – such as the type of cake, the ingredients used to make the mirror glaze, and even where it is stored. Generally speaking though, if you store your mirror glaze cake in an airtight container in a cool place (like a fridge), then it should last for at least 5-7 days before starting to lose its quality.
However, there is another factor which can affect the shelf life of your delicious creation – humidity levels. If the air around your cake is particularly humid or damp, then bacteria may start growing on the surface much quicker than usual; leading to spoilage within 1-2 days instead of 5-7. So if you want to ensure maximum freshness for longer periods of time, try keeping your cake away from areas with high levels of moisture!
How Can I Make My Mirror Glaze Cake More Colorful?
Are you bored with the same old ‘mirror glaze cake’ look? Tired of having your cakes blend in with everyone else’s at parties and special occasions? Well, have no fear! There are so many ways to make your mirror glaze cakes stand out – including adding some color. I’m here to show you how it’s done – so let’s get creative!
Adding a bit of vibrancy can really take any mirror glaze cake from dull to dazzling. You could start by using food coloring or edible paint. Keep in mind that too much of either could end up making your frosting taste bad though – yuck! But if you use them sparingly, they’ll give your cake an amazing and vibrant pop of color.
If you’re feeling bold, why not experiment with different types of toppings for even more colorful fun? Fresh fruits like raspberries, blueberries, and blackberries add a beautiful contrast against the white background of the mirror glaze finish. If you want something a little less conventional, try sprinkles or even chocolate chips! The possibilities are truly endless when it comes to decorating your delicious creation – just be sure to keep it tasteful (and tasty!).
So don’t be afraid to go beyond basic when it comes to making your mirror glaze cakes stand out. With a few simple steps and a pinch of creativity, anyone can turn their ordinary treat into a one-of-a-kind masterpiece that is sure to impress family and friends alike!
Conclusion
I’ve learned all the basics of making a mirror glaze cake. I know exactly what ingredients to use, whether it’s suitable for vegans or not, if it can be frozen and how long it will stay fresh. Now, I’m ready to make my own delicious creation!
To add some extra flair, I’ll bring out my colorful decorations. From sprinkles and candies to nuts and fruits, there are so many ways to make this treat look even more spectacular. With these additions, my cake is sure to stand out from the crowd!
After putting in all this hard work, I finally have a finished product that looks amazing and tastes just as good. My mirror glaze cake has been transformed into an irresistible dessert everyone will love!