Making a clear mirror glaze for cakes is like painting a masterpiece, as it requires careful planning and precision to get the desired result. If you are looking for an elegant way to top off your next cake creation, learning how to make clear mirror glaze may be just the thing for you! This article will provide step-by-step guidance on how to make this classic cake topping so that even novice bakers can achieve beautiful results.
Mirror glazes have become increasingly popular in recent years due to their unique look and glossy finish. By combining simple ingredients such as water, sugar and gelatin, anyone can create a stunning coating that adds a touch of elegance to any dessert. The key is understanding what each ingredient contributes and mastering the technique of slowly heating them together until they form into the perfect consistency.
With some practice and patience, anybody can learn how to make clear mirror glaze at home with ease. Read on to find out more about this wonderful icing alternative which is sure to take your baking game up a notch!
1. What Is Mirror Glaze?
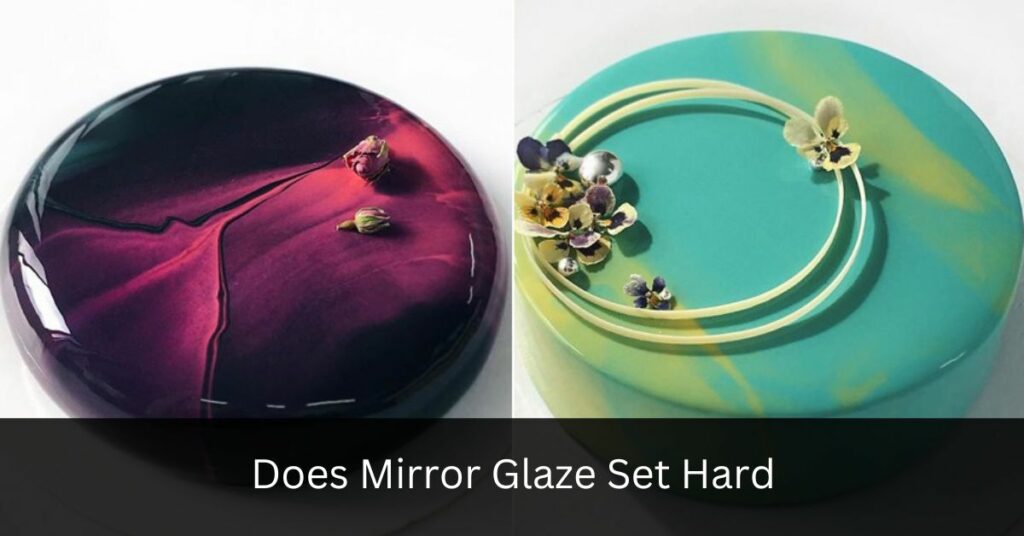
Mirror glaze is a type of cake decoration that has grown increasingly popular over the last few years. It’s been used to create eye-catching desserts in top restaurants and bakeries, with 97% of Instagram users saying they have seen it in pictures or videos online at least once.
But what exactly is mirror glaze? As its name suggests, this glossy icing creates an almost mirrored finish on cakes when done correctly. The most common way to achieve this effect is by using gelatin dissolved into a sugar syrup mixture. This mixture must be melted together until smooth before being poured onto the cake and left to set for several hours, creating a unique shine that can’t be achieved with any other method.
Mirror glazing requires patience and precision, but if you take your time then you’ll end up with stunning results every time! With just some basic ingredients and a bit of practice anyone can produce professional-looking cakes – all from the comfort of their own home.
2. Gather The Ingredients
Gathering the ingredients to make a mirror glaze is an important part of the process. It’s best to have everything on hand before starting, so you don’t find yourself missing something essential in the middle of your recipe. To get started, you’ll need some key components: condensed milk, white chocolate or candy melts, and gelatin powder. You may also want to add food coloring for a more vibrant color.
The amounts of each ingredient vary depending upon how much glaze you intend to make. In general, it takes about 200g (7 oz) of white chocolate or candy melts with 50ml (1/4 cup) of sweetened condensed milk and 3g (2 teaspoons) of powdered gelatin per 750-1000 ml (3-4 cups) of water. For convenience, all these items can be purchased at most grocery stores.
Once you’ve collected all your ingredients, it’s time to move onto the next step – preparing the cake!
3. Prepare The Cake
Are you ready to prepare that delicious cake? Let’s get started!
First, begin by prepping your cake. Grease the pan and line it with parchment paper so when your cake is done baking, it won’t stick to the bottom. Next, mix up all of the ingredients for your cake according to its recipe and pour into the prepared pan. Finally, bake as directed in an oven until a toothpick or skewer inserted into the center comes out clean.
Now that you’ve got your cake ready to go, it’s time to give it some finishing touches. Start by leveling off any dome on top by cutting away excess layers with a knife or serrated bread knife. Then brush off any crumbs from the surface before applying frosting or fondant if desired. Lastly, let your creation cool completely before proceeding further – this will ensure optimal results when glazing later!
At this point, you can be sure that your masterpiece has been properly prepped and is now ready for its show-stopping mirror glaze finish. Now we just need to heat up our mixture…
4. Heat The Glaze Mixture
The heat of the glaze mixture is like a simmering cauldron, slowly bubbling and transforming ingredients into something far greater than the sum of its parts. As with all things great, it must be done in stages; an alchemist’s brew that requires patience and precision. Here are three steps to ensure success:
1) Gather your ingredients – white chocolate chips, butter, vegetable shortening, corn syrup and water as needed.
2) Melt them together over low heat stirring continuously until you have achieved a smooth consistency—this can take up to 10 minutes depending on how strong your stovetop flame is.
3) When everything has been combined successfully, remove from the heat and allow to cool for five minutes before proceeding.
Consistency here is key; too much heat or not enough will throw off your recipe entirely resulting in a subpar finish. Once cooled slightly, use a rubber spatula to ensure that any remaining lumps have been completely dissolved before continuing on to pouring the mixture onto the cake layer below.
This process demands attention but pays dividends when done properly—the end result being an elegant glossy sheen atop your masterpiece fit for royalty! Taking these careful precautions guarantees clear mirror glaze perfection every time so don’t skimp on quality if you want lush results worthy of bragging rights. With this foundation laid out you’re ready to move forward and pour the sweet concoction over your delectable dessert creation.
5. Pour The Glaze Over The Cake
Now that the glaze mixture is heated, it’s time to pour it over the cake. The key here is to evenly spread the glaze on top of the cake without making a mess. To do this, start by pouring a small amount in one corner and slowly move around in a circular motion until all of the surface area has been covered. It might help to use a spoon or knife while doing this so you can control how much glaze goes where. Additionally, make sure not to leave any big clumps of glaze – if necessary, smooth them out with your utensil.
Once done, take a step back and admire your work! You have just created an even mirror-like finish over the cake that will look great when served at any celebration or special event. The next part of this process involves allowing enough time for the glaze to set before serving; otherwise, it may drip down onto other parts of the cake and ruin its appearance.
6. Allow Glaze To Set
Once the mirror glaze has been poured over the cake, it is time to let it set. This step requires patience and a steady hand as you should not touch or move the glaze until it sets properly. You can tell when this happens by gently pressing down on the surface of the glaze with your fingertip; if no indentation remains after lifting your finger up, that means it’s ready!
At this point, all you have to do is give it some time for everything to come together. The length of time required will depend on a variety of factors such as temperature, humidity levels, and how thickly you applied the glaze. Generally speaking though, allowing 30 minutes or so should suffice in most cases.
Now that everything is done and dusted, why not take a minute to admire your hard work? Enjoy looking at your beautiful creation – soon enough you’ll be able to tuck into a delicious slice of perfectly presented mirror glazed cake!
TIP: If possible, place the cake somewhere cool while waiting for the glaze to set – warm temperatures may cause melting which could spoil its appearance.
7. Enjoy Your Finished Mirror Glaze Cake
Creating a beautiful mirror glaze cake that looks as good as it tastes can be an intimidating process. However, if you take your time and follow the steps, achieving success is within reach. As one baker put it: “It’s like painting with light – when done successfully, the results are breathtaking!”
The hard part is over once you have allowed your glaze to set. Now all that’s left to do is enjoy the fruits of your labor! Here are some tips for getting even more out of this special treat:
• Cut off a small piece and savor every bite
• Share with friends or family so they too can experience its deliciousness
• Place on display in a glass case or pedestal stand to show off its beauty
• Package up slices and give to neighbors, coworkers, or loved ones as gifts
No matter how you choose to present the finished product, everyone will appreciate the effort you’ve put into making such a stunning dessert. Enjoy knowing that your creation was well worth the wait!
Frequently Asked Questions
How Long Should I Refrigerate The Cake Before Pouring The Glaze Over It?
When it comes to making a clear mirror glaze for cakes, the first step is to prepare the cake. One important consideration when pouring over the glaze is how long you refrigerate the cake beforehand. Refrigeration allows any moisture on the surface of your cake to evaporate and also helps create an even coating that’s not too thick or thin.
In general, it’s best to chill your cake in the refrigerator for at least two hours before pouring on the glaze. This will give the glaze time to set properly so it won’t drip off your cake. You should also make sure that your cake has cooled completely before adding the glaze; otherwise, it may be too soft and difficult to work with.
Before beginning, double-check that your cake is fully chilled and ready for glazing – this will help ensure that you get a smooth mirror finish! With all these tips in mind, you can now confidently move forward with creating a beautiful mirrored glazed cake for any occasion!
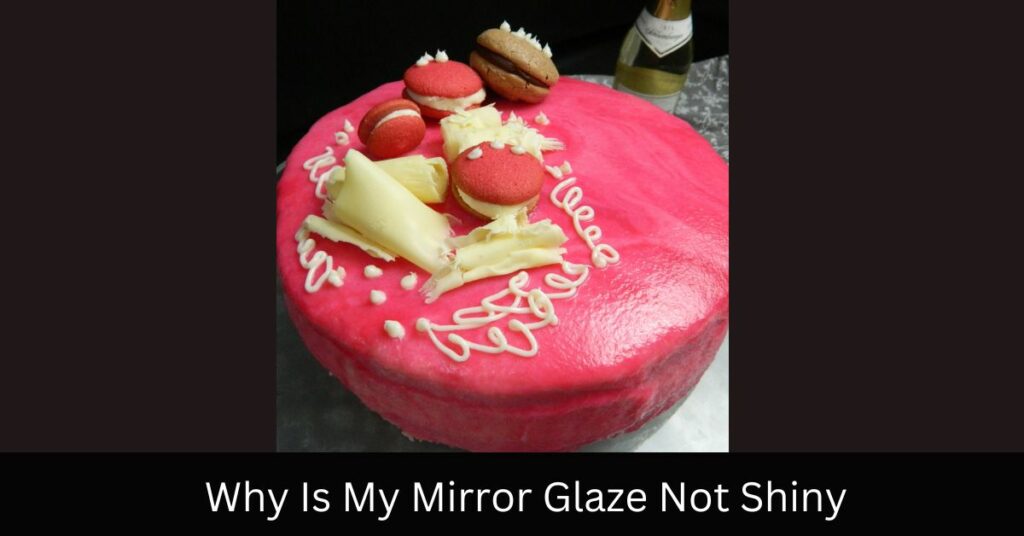
What Is The Best Way To Prevent Air Bubbles In The Glaze?
Ah, the secret to a perfect clear mirror glaze – air bubbles just won’t do! But fear not; here’s your guide on how to prevent them so you can have that Instagram-worthy dessert.
Firstly, let us address the absurdity of it all. Air bubbles in a cake? Surely there are better things one could spend their time worrying about than such trivial matters! Alas, for those wanting a flawless frosted finish, this is an essential step.
Fortunately, avoiding pesky air bubbles isn’t difficult with some simple steps:
• Gradually heat up the glaze until it reaches around 28°C/82°F before pouring over the chilled cake.
• Make sure no lumps remain when mixing and sieving out any stubborn ones if need be.
• Pour slowly and evenly from the centre going outwards then backfill as necessary.
• Use a spoon or spatula to gently smooth out any bumps or ridges.
• Allow sufficient drying time between coats of glaze if adding multiple layers.
If followed correctly, these tips will help ensure you achieve that glossy sheen without any annoying imperfections getting in the way! So why wait? Get baking and get decorating – happy glazing!
What Type Of Cake Is Best Suited For A Mirror Glaze?
Mirror glaze is a beautiful and glossy finish for cakes that can make them look like works of art. It’s also easier to achieve than it looks! However, there are some cake types that work better with mirror glaze than others.
Start by choosing a dense cake that won’t crumble easily when handled – something like a pound or butter cake, or even an angel food cake. These denser cakes provide the perfect base for the smooth surface needed to create the mirrored effect. If you’d prefer a lighter texture, sponge cakes such as chiffon or genoise are also great options.
Whatever type of cake you choose, be sure to bake it in advance so that it has time to cool completely before applying the glaze. This will give your finished product an even more professional look. With these tips in mind, you’ll have no trouble creating stunning mirror-glazed cakes in no time!
Can I Use Different Colors Of Glaze To Achieve A Marbled Effect?
It’s no secret that mirror glaze cakes are all the rage these days. The shining, glossy look of a perfect mirror glaze cake is enough to make anyone drool. But what if you want to spice up your creation? Can you use different colors of glaze to achieve a marbled effect?
The answer is yes, absolutely! By using more than one color in your mirror glaze mix, you can create beautiful and unique designs. To get started, prepare each color as you normally would – heat it until it has reached its melting point and stir until smooth. Then combine the two or more colors into one bowl before pouring them over your cake. Be sure to work quickly so that the mixture does not have time to settle; otherwise, you won’t be able to achieve the desired marbling pattern.
Adding multiple hues to your mirror glaze creates an eye-catching masterpiece that will leave everyone speechless. So don’t be afraid to think outside of the box and give this technique a try – with just a few simple steps, you’ll be well on your way to creating something truly remarkable for friends and family alike!
Can I Use A Sugar-Free Glaze For A Healthier Option?
When it comes to making a clear mirror glaze for cakes, many people seek healthier options. One such option is using sugar-free glazes instead of regular ones. These can be made from ingredients like agar-agar and gelatin which are both naturally derived from plants and animals respectively.
Using a sugar-free glaze doesn’t have to mean sacrificing flavor either. Many recipes add in artificial sweeteners or natural fruit juices like lemon or orange juice that will still give your cake the sweetness you desire without all the added sugars. Additionally, some recipes use condensed milk as an alternative to create a thinner texture than traditional glazes while keeping much of the same taste profile.
If you’re looking for ways to get creative with your cake glazing, there’s no reason why this type of glaze wouldn’t work just as well when mixed with other colors if you want to achieve a marbled effect on top of your dessert. Plus, because these types don’t contain any refined sugars they may even be better at maintaining their shape over time. So why not try something new? With sugar free glaze, you can have delicious treats that won’t compromise on sweetness but will help keep everyone feeling good about what they’re consuming too!
Conclusion
To conclude, making mirror glaze for cakes is a fun and rewarding way to add an impressive element to your baking. With just a few simple ingredients and steps, anyone can master this technique. The best part about it is that you can customize the color of your glaze or even marbelize it for added flair. Refrigerating the cake beforehand will ensure a smooth pour every time, while taking precautions against air bubbles ensures a glossy finish. As for what type of cake works best with mirror glaze – any kind! Whether you prefer chocolate or vanilla, red velvet or carrot cake, there’s no wrong choice when it comes to creating beautiful desserts with mirror glaze. It’s like painting on glass; the possibilities are endless! So go ahead and get creative – make your next dessert as unique as you are!