Creating a beautiful cake with mirror glaze is an art that requires precision and patience. But, before one can begin to craft the perfect confectionary masterpiece, they must first decide what kind of cake to use for their project. There are many cakes that work best when paired with mirror glaze – from spongy swiss rolls to delectable devil’s food cupcakes.
The decision on which type of cake to pick should be based on flavor preferences as well as texture and presentation needs. If you want your finished product to have a stunning sheen, then selecting the right kind of cake is paramount! Perfecting the pairing between frosting and foundation will ensure your creation stands out in style and taste.
So if you’re looking for some inspiration about what kinds of cakes pair perfectly with mirror glaze, read on – this article has got all the information you need!
1. Overview Of Mirror Glaze
Mirror glazes have become increasingly popular over the past few years, with more and more people using it to decorate their cakes. In fact, a survey of bakers found that nearly 78% had used mirror glaze in the last year alone. This makes sense given its easy application process and stunning aesthetic effect when hardening.
Mirror glaze is actually quite simple to use – all you need are some basic ingredients like white chocolate and sweetened condensed milk. It’s also important to remember not to boil the mixture while making your own version of this classic cake topping. When finished correctly, mirror glaze will create an intensely glossy finish which can be tinted any color you’d like!
With so many options out there for how best to utilize mirror glaze, choosing the right type of cake is key. Depending on what kind of look you want to achieve, different types of cakes can work better than others; from light sponge cakes to denser pound or carrot cakes. The possibilities are endless, so why not get creative?
2. Prepping The Cake
As the old saying goes, good things take time. Preparing a cake for mirror glaze is no exception and requires some skillful baking to get just right. To begin, it’s important to select the perfect type of cake that will support your desired outcome.
Next steps involve prepping the cake so that you can ensure an even coating when pouring the glaze over top. Make sure to grease or line your pan before adding any batter as this will help with taking out the finished product later on. Additionally, avoid using overly wet batters like angel food cakes as these are more difficult to work with due to their high moisture content.
Once you’ve found a suitable recipe and prepared the pan, it’s time to bake! Be sure to keep an eye on it until done—no one likes dry crumbs in their final product. With care and patience, you’ll have a beautiful base ready for your next step: applying the mirror glaze!
3. Types Of Cake To Use
Surprisingly, when it comes to mirror glaze cakes, there’s no one-size-fits all approach. As counterintuitive as it may be, the type of cake you choose can make or break the success of your end product.
The key is knowing which features to look out for in a cake that will provide an ideal base for this classic dessert:
- Moisture Levels:
- A moist yet stable cake holds up best against the glaze and provides an even surface area with minimal crumbs.
- Avoid overly dense cakes like pound cakes because they don’t always hold their shape well once cut into portions.
- Texture:
- Cakes with a fluffy but firm texture are great candidates for mirror glazing since they won’t crumble under the pressure of being moved around on the plate.
- Denser sponges work too if you prefer them over more airy options.
When selecting a cake for mirror glazing, keep these tips in mind so that you achieve optimal results each time. With this information in mind, now we move onto decorating the cake!
4. Decorating The Cake
Once you’ve selected the type of cake to use for your mirror glaze, it’s time to get decorating. Depending on the design and look you’re going after, there are a few things to consider before getting started.
Firstly, make sure that the cake is completely cooled off before attempting any decorations; this will help prevent unwanted melting or slipping when applying the glaze. For best results, place the cake in an airtight container overnight so that it can cool slowly and evenly. Additionally, ensure that all crumbs have been removed from the surface of the cake prior to adding the glaze.
The next step is to start preparing your design elements: fondant cutouts, edible flowers, sprinkles — whatever you’d like! Once these pieces have been attached securely to the cake (using buttercream icing as glue), let them sit for about half an hour so they adhere properly before starting with the glazing process. Now it’s time to move onto tips for applying mirror glaze – but first, be sure everything is ready and safe to go!
5. Tips For Applying Mirror Glaze
Once you’ve decorated your cake, it’s time to apply the mirror glaze. Here are some tips for a smooth finish!
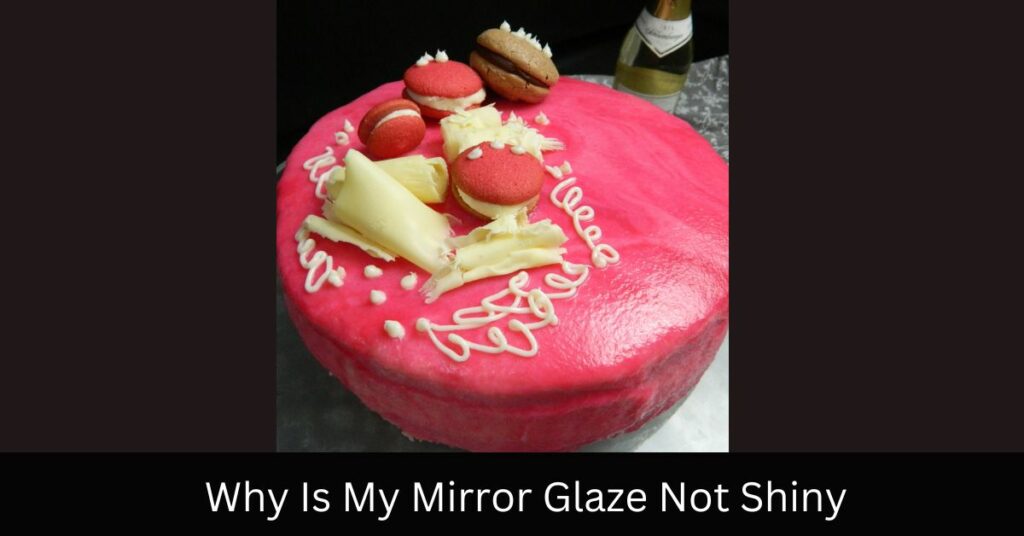
First, make sure that your cake is completely chilled – this will ensure an even coating and help the glaze stay in place. You should also be sure to use a very thin layer of glaze; too thick, and it won’t dry properly or give off the desired reflective effect. And don’t forget to work quickly: once the glaze is applied, it needs to set before any decorations can be added.
Finally, if there are any gaps in coverage when you’re done applying the glaze, just go back with another layer. This’ll help create an even surface and give you better results overall. Next up we’ll look at troubleshooting common problems with mirror glaze – so keep reading!
6. Troubleshooting Common Problems
Applying mirror glaze to a cake is like painting a masterpiece: it requires patience, precision and finesse. With the right guidance however, achieving that glossy finish becomes much more achievable! Troubleshooting common problems in mirror glazing can help ensure your creation lives up to its full potential.
First off, when baking cakes for mirror glazing, make sure not to overbake them or else they’ll be too dry and won’t absorb the liquid glaze. Additionally, don’t forget to let the cakes cool completely before applying – otherwise the hot cakes will cause the glaze to melt away. If you’re having issues with bubbles appearing on your cake after pouring, try letting the mixture sit for about 5 minutes first – this should allow any air pockets to rise so you can skim them out of your bowl.
Finally, if you find yourself struggling with getting an even layer of coating across your entire cake surface then consider using an offset spatula as these are ideal for spreading out small amounts at a time while preventing excess dripping along sides and edges. By approaching each issue methodically, you can easily navigate through potentially tricky scenarios without ruining all of your hard work. Now we can move onto best practices for storing and serving our shiny sweet treat!
7. Best Practices For Storing And Serving
Putting together a perfect dessert for any special event can be quite a challenge. Fortunately, mirror glaze cakes are the ideal choice to make an impressive masterpiece! To ensure that this amazing creation goes off without a hitch, there are some best practices one should follow when storing and serving their cake.
To begin with, it is important to store the cake at room temperature in an airtight container or covered with plastic wrap until you are ready to serve it. If kept cold in the refrigerator, condensation may form on the surface of your cake which could ruin its beautiful presentation. Additionally, if you plan on transporting the cake over a long distance, investing in a specialized storage box can keep your cake safe from bumps and bruises during transit.
Serving your mirror glaze masterpiece is just as easy – all you have to do is choose the right plate and platter size for presentation purposes. A larger plate will allow more space for guests to cut into individual pieces while smaller plates can help create portion control. Once presented, let everyone take time admiring your incredible work before digging in; after all – food always tastes better when served with style!
Frequently Asked Questions
What Ingredients Are Needed To Make Mirror Glaze?
Mirror glaze has become increasingly popular with amateur and professional bakers alike. It’s an eye-catching finish that adds a gorgeous glossy shine to any cake, making it look like a work of art. But creating this delicious masterpiece isn’t as easy as one might think! To make mirror glaze, you need some key ingredients: gelatine powder, powdered sugar, condensed milk, glucose syrup, and water.
At first glance, these may seem straightforward enough but there is more to consider when using them together. For example, the amount of liquid used in each component can vary depending on what kind of effect you want for your final product – too much moisture can leave your glaze looking dull instead of shiny and reflective. Similarly, the ratio between the gelatine and other ingredients matters greatly; if you don’t get it right then your glaze won’t set properly.
Once you have all the ingredients ready it’s time to start assembling them into a smooth mixture suitable for coating cakes. Start by melting the gelatine powder in warm water until fully dissolved before adding the rest of the ingredients gradually while stirring continuously so everything combines nicely without lumps or clumps forming inside. Then pour your finished mix into a bowl lined with cling wrap and let cool down at room temperature before use – this step is essential because overheating will ruin your desired outcome!
TIP: When preparing mirror glaze make sure to take extra care when measuring out each ingredient according to their specific ratios! This way you’ll be able to achieve optimal results every time.
How Long Does It Take To Make Mirror Glaze?
Making mirror glaze is a popular way to decorate cakes, but it takes time and precision. Depending on the recipe you use, the process can take up to an hour. Here’s what you’ll need:
- Preparing ingredients:
- Sugar
- Gelatin powder or sheet gelatin
- Glucose syrup
- Heating and melting ingredients together:
- Water
- White chocolate chips or cocoa butter
- Cooling down and thickening your mixture:
- Milk, cream, or heavy whipping cream
Once all of these items are prepped, then comes the actual cooking part. You’ll have to melt the white chocolate chips with glucose syrup in a double boiler system, as well as add some water while stirring frequently over low heat until everything mixes together nicely. After that, you’ll need to dissolve the gelatin in warm milk so that it forms a consistent texture when added to the melted chocolate. Finally, let this cool for about 30 minutes before transferring it into a bowl where you will beat until it reaches desired thickness. Be sure not to overbeat or else it won’t be glossy enough!
So there you have it! Mirror glazing may seem complicated at first glance but once you break down each step and get comfortable with working through them one by one, making delicious looking cakes should become a breeze.
How Long Does Mirror Glaze Last?
Mirror glaze is the ultimate cake decoration, providing an impressive and delicious finish that puts all other cakes to shame. It’s a dessert with a touch of elegance – but how long will its beauty last? Let us investigate the lifespan of this popular culinary product.
It turns out mirror glaze can be pretty enduring if stored correctly:
•\tKept in a cool dry place it should remain intact for up to 6 weeks
•\tIf refrigerated, it can keep even longer – as much as two months!
•\tFor optimal results, store at temperatures between 5-10C
•\tBe sure to apply the glaze on the day you plan to serve your masterpiece
•\tNever put any leftover unapplied glaze back into storage – unless you like mouldy food!
The moral of this story? Mirror glaze is a wonderful way to top off cakes and pastries and make them look truly spectacular. With some simple care and attention though, you’ll maximise its shelf life and enjoy beautiful desserts for many meals to come.
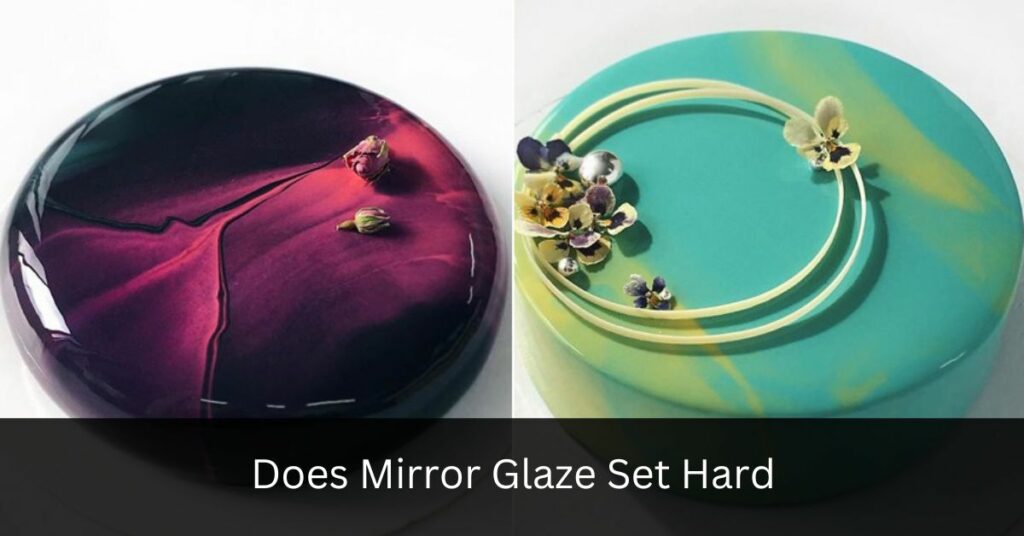
How Do I Know When The Mirror Glaze Is Set?
Pondering how to prepare the perfect mirror glaze can be perplexing. Knowing when it has set is critical for achieving a flawless finish and ensuring your cake looks its best. So, what’s the answer?
When working with mirror glaze, paying attention to timing is key. As it cools, the consistency will thicken and become more opaque, losing that glossy sheen. Once this happens, test if the glaze is ready by gently touching it – if you find it’s still soft like jelly or syrup-like in texture then it needs longer to set. However, once firm enough so that a finger pressed into the surface leaves an indentation without sticking, your mirror glaze is ready.
Making sure your mirror glaze sets properly is essential for creating a stunning showstopper dessert. Timing is of essence here; check regularly until you feel confident that your masterpiece is complete!
Is Mirror Glaze Safe To Eat?
Mirror glaze is a beautiful, glossy finish that can completely transform the look of a cake. It’s eye-catching and delicious – but is it safe to eat? Yes! Mirror glaze has three key ingredients:
1) Gelatin
2) Condensed Milk
3) Glucose Syrup.
All of these components are edible with no adverse side effects when consumed in moderation. However, you should be sure to check all labels for allergies or any other health concerns before consuming mirror glaze cakes.
It’s important to remember that gelatin isn’t suitable for strict vegetarians as it usually comes from animal sources. When using ready-made mixtures, always make sure they do not contain allergens like nuts or eggs, depending on dietary requirements. Also consider how much sugar is used in the recipe – too much may cause an upset stomach or tooth decay if eaten regularly over time.
In general, mirror glazes are considered safe to eat when made correctly and kept within recommended consumption levels. As long as you follow the instructions carefully and keep them away from heat sources such as ovens, mirrors glazes can add a unique touch to your special occasion desserts while also being totally safe to enjoy!
Conclusion
Mirror glaze is one of the most popular and beautiful cake decorations out there. The glossy finish creates an eye-catching effect, making it perfect for all occasions. So, what kind of cake should you use?
Well, I believe the best type of cake to use with mirror glaze is a dense sponge or pound cake. These cakes are sturdy enough to hold their shape when coated in the glaze. Plus, they’re flavourful enough that your guests won’t be overwhelmed by just sugar! Just make sure you prepare your cake ahead of time as this will give you more control when pouring on the glaze.
Using mirror glaze can be a daunting task but if you take your time and stay patient it pays off. It’s like life – sometimes we have to go through many obstacles before reaching success! As long as you keep trying and don’t give up, eventually you’ll get there – metaphorically speaking, at least (or literally speaking, depending on how well your cake turns out!)
So next time you’re looking for something special and unique to decorate your cakes with, consider using mirror glaze! With a little bit of practice and patience, anyone can master this technique and create some stunning desserts for their loved ones – not only will you impress them with looks but also with taste!